Every sewer needs a few more tools besides their sewing machine! Oddly enough, the hardest part about sewing is the preparation. The most basic sewing tools are for measuring and cutting which need to be done with precision. Getting the steps right leading up to the actual sewing part are essential for having your project be a success. So choosing tools that help you achieve this most effectively are key. In general, I found choosing the best quality tools when possible are always a better value than going with cheaper ones first. It’s also likely you will need various types of the same kinds. It’s unfortunately necessary that you will need many tools. So choosing wisely is a task in itself. Here are the tools I feel every home sewer needs to get started. See Where To Buy: Sewing Supplies for where to get it all!
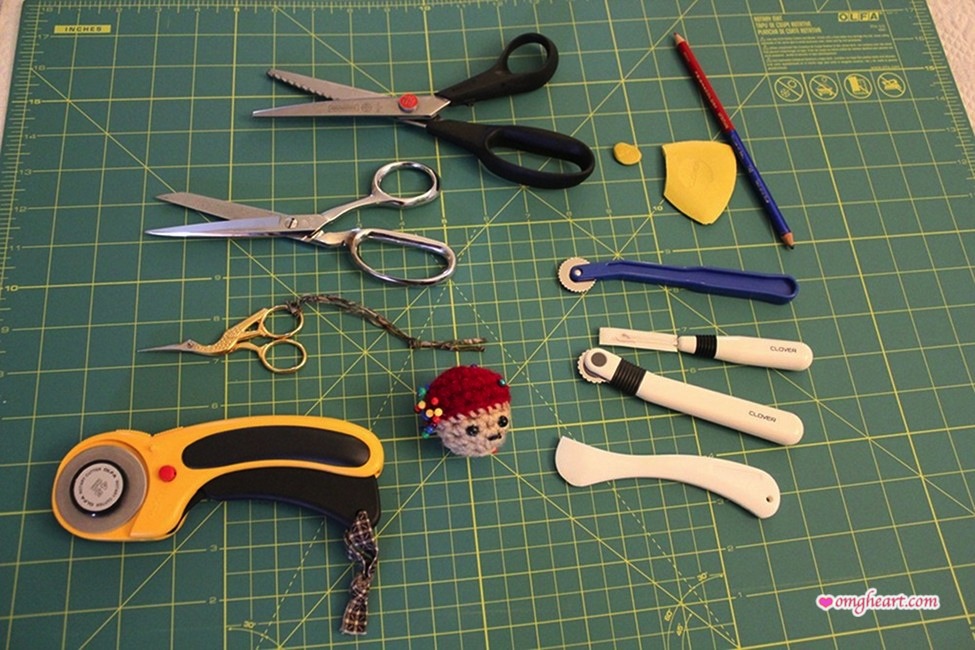
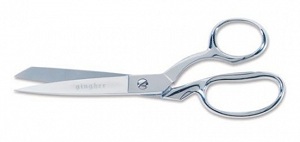
Dressmaker Shears or Fabric Scissors, 8″
Gingher 8″ Dressmaker Shears are highly recommended. I have Mundial 7″ Dressmaker Shears and I can feel the difference. I chose them for the size and price. Choose the best ones you can afford for these. You will be doing a lot of cutting and cutting neatly and accurately is key. So a nice pair of Ginghers are invaluable. To me, a Rotary Cutter for all cutting needs is ideal, the smooth precision is unbeatable and I like neat!, but cutting curves with the rotary cutter is a more advanced technique which will take more practice (and smaller-sized blades and a humongous self-healing mat depending on the piece), so for now Dressmaker Shears are most effective.
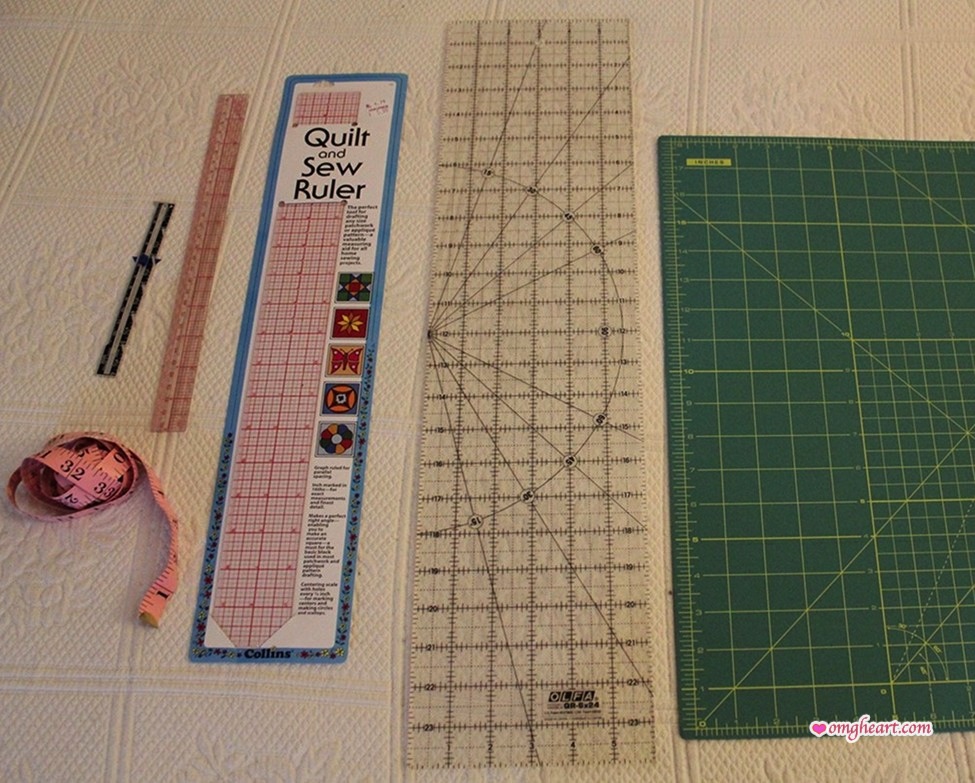
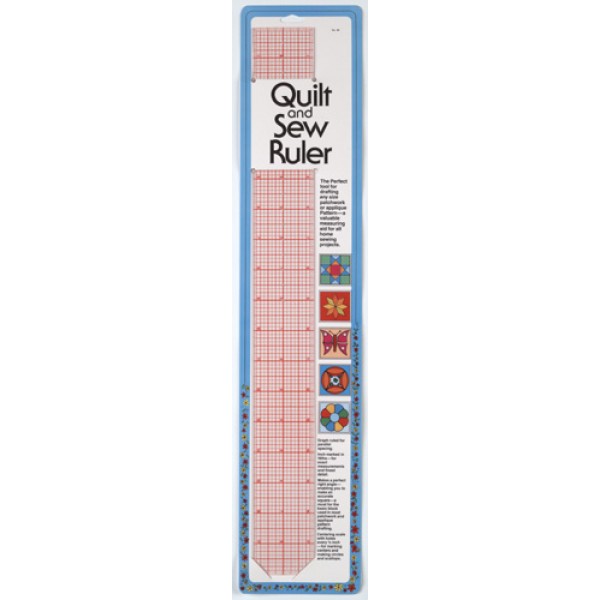
Clear Acrylic Rulers
Clear acrylic ruler with red markings. This is different from the heavy clear acrylic quilting ruler used for rotary cutting. This one is thin, light, and floppy. It will not drag on delicate or stretchy fabric like the quilting ruler and throw off measurements. Collins Quilt and Sew Rulers and C-Thru Rulers are the ones I like. I have both in 2 sizes.
Tape Measure
Any tape measure will do. This is to measure yourself to match appropriate sizing for your garment and spot checking.

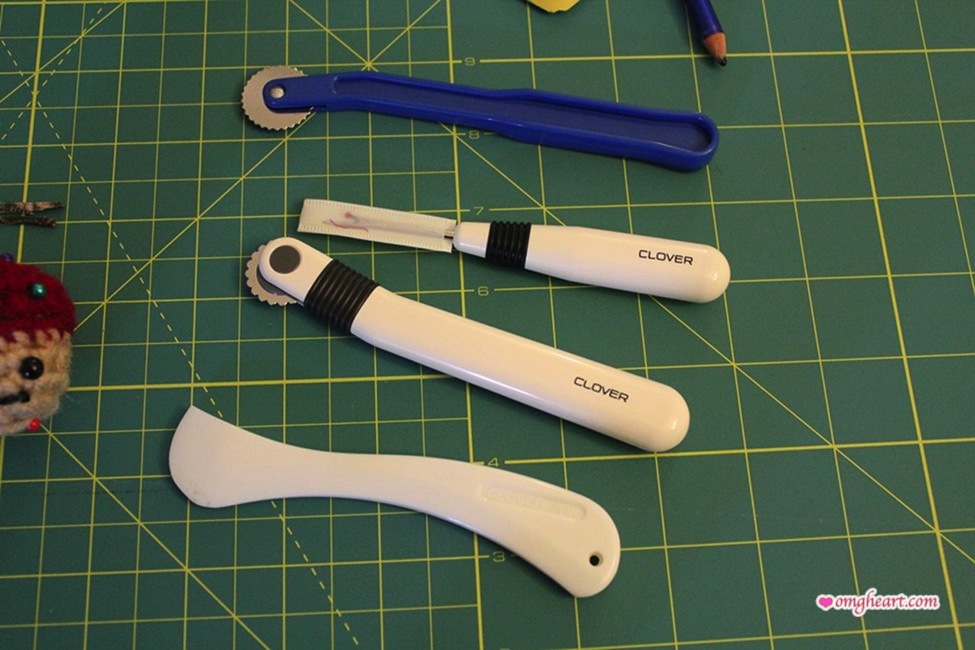
Tracing Wheel – Smooth or Pointy
This tool is used with tracing paper to trace a pattern onto your fabric. Dritz and Clover are great brands for tracing wheels.

Tracing Paper
This is for tracing your pattern onto your fabric. I trace rather than cut into the pattern paper. I trim around the largest outline on the pattern, just to make it easier to handle, then trace the outlines of the correct size onto the fabric (including notches and dots), remove the pattern paper, and then cut using the chalk marks.

Fabric Marking Tools
These come in many old and new-fangled forms. The most traditional is the tailor’s chalk and hera marker. To the more modern chaco liners, mechanical pencils etc. Clover has a nice list here.

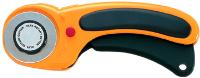
Rotary Cutter – 45mm
45mm is a good standard-sized cutter to start with, suitable for most beginner projects. I chose the Olfa Deluxe Rotary Cutter after trying it in my sewing class. I like the way it is angled, most rotary cutters are like a stick with the blade on the end. This one is slightly offset, it has a trigger in the handle you must squeeze to have the blade extend, and a safety button that keeps the blade from extending when locked. Going with a smaller diameter blade will allow for more intricate cutting.
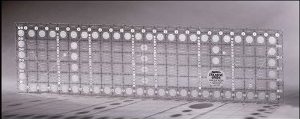
Quilting Ruler
This is a clear acrylic non-slip ruler for using with a rotary cutter and of course measuring your fabric. My sewing class teacher suggested the Creative Grids Ruler 24×6.5in seen below. I prefer the Olfa Frosted Quilting Ruler, it’s much easier to see the markings on different color/print fabrics. My least favorite is the OmniGrip ruler with yellow and black markings that are difficult to see in busy fabrics.
Self-Healing Mat
Measuring your fabric accurately is essential for having your project turn out right. Armholes, pockets, buttons etc need to line up! The mat is used as a base for your rotary cutting and is also marked with rulers and guides for lining up your pieces in conjunction with your quilting ruler. This placed on a large stable working surface is where you do most of your sewing prep. Choosing the right-sized mat for a beginner (with a small apartment) was my biggest concern. I needed the smallest sized mat that was versatile enough for most beginner projects. Too small and I’d have to get more than one for other projects, too large and it would be unwieldy to store when not in use. So I chose the Olfa Self-Healing Mat 18x24in. It’s already too small!
Glass Head Straight Pins or Quilting Pins
I used any old pins I had from knitting/crochet for blocking my pieces. But my sewing class recommended Clover Brand – Long.

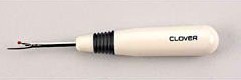
Seam Ripper
Choosing the right seam ripper is also key because this tool helps you undo your sewing mistakes. Which is frustrating enough as it is. So a very comfortable, well made, well chosen seam ripper is important. I like the Clover Seam Ripper 482 W. I tried it in my sewing class and loved it. It’s the perfect size, the point is extremely delicate and sharp, especially handy for small tight stitches, and it can double as a tool for making button holes for magnetic snaps and more! I chose this over the ultra-sleek Gingher because the point on the Gingher isn’t as fine so it makes it less versatile. Learning how to use seam rippers properly is also important.
An Iron
This might not sound like an essential. But it was extremely integral in helping me measure and cut my fabric properly by making the material easier to work with. It also helps to seals the stitches in place. So one of these and an ironing board is mandatory! A starching element is also helpful if your fabric is slippery. Even with all the above, I had a hard time accurately measuring and cutting. Plus, it makes your project look much more finished and professional. Rowenta or Oliso are very popular brands for Sewing and Quilting.

Pinking Shears (optional)
For me this is a necessity. If you don’t have a sewing machine with zigzag stitch or a serger, pinking shears are a handy tool for finishing raw fabric edges. Pinking Shears have zigzag teeth that will cut the fabric edges into zigzag shapes. Using pinking shears to trim your fabric and then a straight stitch will help you finish fabric edges and keep them from unraveling without the use of a zigzag stitch or a serger. Choose the best ones you can afford because it’s difficult enough to cut neatly with Pinking Shears, so investing in a well crafted one is ideal.


Pattern Ease Tracing Material or Swedish Tracing Paper (optional)
This is for making master patterns. Most patterns come on very flimsy tissue paper which either won’t last long or will be damaged easily. Also, keeping your original tissue pattern intact so that you can make other sizes in the future is a nice option. So using pattern material to copy the original pattern onto is a great way to do both! For a home sewer this might be too much of an investment. I’m currently searching for a more economical way to keep original patterns intact while transferring them to a more durable material.
~
In general, I love Clover Brand tools and notions for all my knitting, crochet, and sewing needs. They make very high-quality yet affordable items. Your tools are really important and all the little attention to detail in the Clover craftsmanship are consistently excellent.
ARNOLD
Hello,
Please advise costs to place an ad on your site.
Arnold Poster
Holiday Designs
Quiltwithdonna.com
OMG! Heart » Quilt Block Patterns
[…] Quilting will require a few special tools that a home-sewer may not already have including a rotary cutter, self-healing mat, and non-slip grid ruler like an Olfa or OmniGrid. My first sewing class was taught by a quilter so these were the first […]
OMG! Heart » My Singer Sewing Machine
[…] the last 2 stitches requires a few modifications in your sewing technique. Mainly, the addition of Pinking Shears to seal raw edges and learning to pivot fabric neatly and sew back manually in order to Back […]
OMG! Heart » A Note About Beginning Sewing
[…] will also need a few other sewing tools to begin your sewing journey. See here for a list of Beginning Sewing Tools I started out […]
OMG! Heart » Pattern: Simple Baby Blanket
[…] here for my list of online places to buy fabric. Also, the right tools really help a project come out […]
OMG! Heart » How-To: Simple Baby Bunting
[…] Cutter, Quilting Ruler, Self-Healing Mat, and fabric chalk to cut all my triangles. Supplies found here. Craftsy also has a lovely tutorial on simple baby blanket with applique […]
How-To: Simple Baby Bunting | OMG! Heart
[…] Cutter, Quilting Ruler, Self-Healing Mat, and fabric chalk to cut all my triangles. Supplies found here. Craftsy also has a lovely tutorial on simple baby blanket with applique […]
DIY Fabric Face Mask Supplies | OMG! Heart
[…] My Sewing Machines here, http://omgheart.com/tag/sewing-machines/ My fave tools and notions here, http://omgheart.com/2010/11/28/sewing-tools-and-notions/ My Note About Beginning Sewing here, […]
Where To Buy: Sewing Supplies! – OMG! Heart
[…] mecca, here are the best ones I’ve found so far in NYC and online! Here’s my list of Beginner Sewing Tools too. See also a short list of where to find Trim and […]